Lighting Macro Shots - One of Many Methods
In professional ($) studio photography the use of reflection and refraction (translucent) panels are super common. Just about every kind of shot uses them. Often there are many set up just for one shot. They make a huge amount of difference and it's usually nothing you can achieve through software although if you had a week to do the edit in a package like LightWave3D, Maya, XSI, Houdini, or the another 3D package you could probably pull it off in some cases.
But I guess even though most of the people here are mainly using M4/3 or other cary-about cameras and don't have access to a studio and all the goodies found in one, we can still use those techniques. There's all kinds of stuff you can do with a flash or two just using the surfaces in whatever environment you're in.
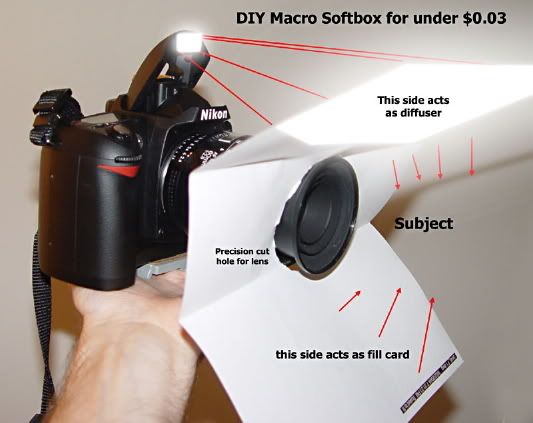
Allow me to show you a tool I carry with me just about all of the time and tutorialize how I came to create it. Most here have probably already read about the paper trick. It's an old trick to be sure - probably the best explanation I've ever seen of it was this image:
This paper helps but as I'll show, it's not really the best solution.
What I was actually attempting to do was to increase the size of the light source that illuminates a given subject whether it's an insect, still life, or etc. and also at the same time increase the directions from which it's lit. Larger light source = more angular direction = softer lighting, shading, and shadows.
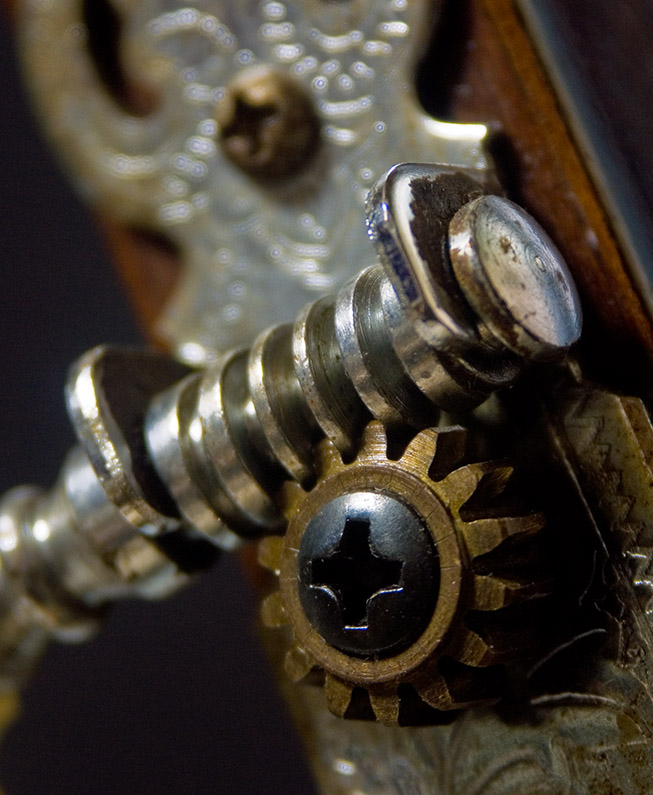
The problem I was exploring solutions for was of course the hard (sharply defined) shadows and harsh specular reflections typical of flash photography especially at macro distances. Those things are OK actually but they're so common and so uniform across practically every rig that people are overdosed you might say, with images that contain those qualities. ; ) Here's an example of a flashed macro shot on the same Minolta A2 mentioned above:
Straight Flash - No diffusor. (Notice the hard shadows and harsh lighting.)
Let's look at some comparative examples. What gave me my idea in the first place was using studio soft-boxes. There are small soft-boxes for macro but I don't own one so I cannot provide examples here to compare. There are some however on the LimiQuest product site here:
http://www.lumiquest.com/lq925.htm And here's what that looks like:
We should notice 3 or 4 things right off the bat here.
- Its construction implements an extra thick center panel to attempt to combat the hotspot the flash will produce. Such a hotspot would defeat most of this diffuser's usefulness. Smart, but now we have to use allot more power to achieve the same quantity of light. Probably not too bad with a professional grade flash though and there are several that can work with your G1 and this product.
- It's using extremely inexpensive materials with translucent properties. It looks like vinyl (naugahyde) to me. ; )
- And we're still emitting light from the same basic direction - in front of the subject. If you can get real close this is probably not a problem and certainly I've seen many examples here are a great testament to just how well it can work when fitted on a fairly strong dedicated flash unit.
The paper thing is a good idea but it doesn't incorporate any conventions for hot-spot elimination so allot of the affect is wasted and additionally your flash has to use several times the power. Paper isn't made of a substance wherein much if any subsurface scattering occurs so during flash transmission it's fluorescence will be low causing uneven lighting, that hop-spot, and etc. My biggest problems with the paper however, are that it's not usable in even the slightest wind and I don't look my coolest with a piece of paper stuck to the front of my camera. : D And for a man my age who still spends as much as I do in a month on fashion I've come to the conclusion that looks are fairly important to me. ; ) Here's an example using the paper method as a diffuser:
Flash with Paper Rig Diffuser (Notice slightly better shadows, but unevenly lit.)
So I took a trip to the One-Dollar-Shop (hyaku yen shop - in Japanese ;^| ) to see what materials I could sabotage from existing products. I found two plastic trays that seemed like they would fit the bill so I plopped down my Y200 (plus tax) and off I went.
Once home I got out my implements of destruction - a soldering iron and a box-knife in this case, and began hijacking the goods. I used the soldering iron to poke a hole and very slowly melt a cut all the way around like you see below. I used the razor knife to cut off the rough lumpy edges that remained.
For the white plastic one I additionally soaked it in scalding hot water for 30 seconds and bent up one end of it to "catch" more light - as I'm intending to lay these down over the subject as flat as possible in order to extend the farthest angle of light transmission - thereby getting the softest falloff and softest shadows possible with this new lighting "tool". Toward the end of post I'll show how it's being held.
Notice the clarity or translucent properties of the materials here as they lay on the towels.
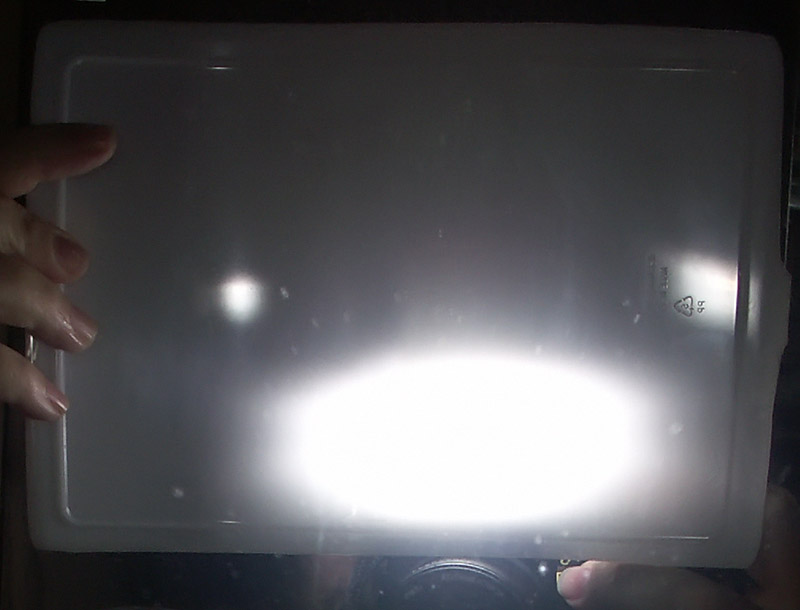
Here's the clearest one looking at the amount of translucent diffusion over a distance of 0 ~ 40cm.
Here's the whitish one looking at the amount of translucent diffusion over a distance of 0 ~ 40cm.
So with them all cut and ready to use, I tested and compared them on an identical scene. Here's the clear-ish one first. I was thinking that the rough "frosted" surface texture of this plastic would help to diffuse the light more while requiring less energy and battery draw. I held it extended out over the subject about 10 degrees up from parallel off the lens barrel or "film axis" if you're into the proper terms.
Flash With Frosted Clear Plastic Diffuser Panel. (Improved shadow softness, slightly hot center)
Well, the results were pretty good. The shadows seem much better than the paper and I look a little less dorky using it. It's not as good as I expected but a step in the right direction I guess. I noticed while using it that it didn't "light up" during flash ignition and become evenly fluorescent-like. It maintained a slight hot-spot. I guess that shows in the exposure. Next I tested the white plastic one:
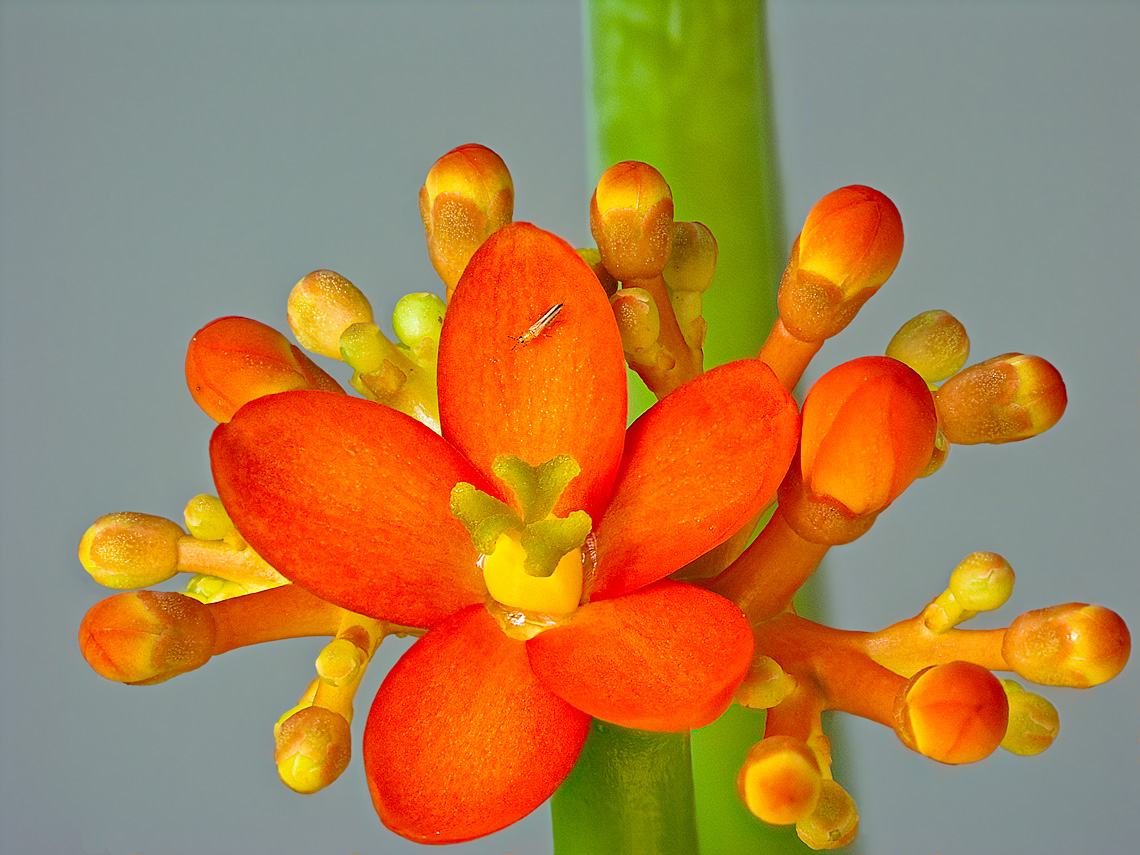
Flash With White Translucent Plastic Diffuser Panel. (Even better shadow softness, better center lighting)
This is more like it! This is what I was expecting pretty much. The angle you hold it at is fairly critical to whether or not it produces soft shadows or acts more like
a typical "real" diffuser cap which only softens them slightly. Here's the image I spoke of that shows the position it's held in for the softest shadows. Also notice here how the whole thing "lights up" creating a fairly affective diffuse light source (when held at the lower angle) - nice!
White Plastic Diffuser ~15° off Film Axis - Fluorescent-like Transmission Properties
White Plastic Diffuser ~90° off Film Axis - Diffuser-cap-like Front Hot Lighting.
In the top image it's actually difficult to tell just how low of an angle it's at. It's 25 cm in length and the angle of the camera & mirror make it look a little steeper than it is - but you get the idea. The curved end is (supposed to be) for subjects at a distance greater than 30 cm or so. It hasn't worked very well so far, I think if I scald it again and bend it up at a 80 degree angle or so it would tho! But then it won't tuck nicely under my shirt stuck in the waistband of me pants round back now lay flat in a camera bag. : P
I feel I got pretty good value for my $2.00 and 2 hrs spent all total. I've been using it for over a year now and placed in the pouch pocket of a camera back-pack it adds an additional layer of protection for the camera equipment inside the main bag too. Anyway, here's take a closer look at a few areas in those shots and compare them side by side to see the differences better.